DIY Cardboard Toy Camera - It's Interactive!
My first DIY project of the year and it’s a fun one! Simon bought me a Cricut Joy for Christmas and I couldn’t wait to use it to make something fun for Peggy. This toy camera was the perfect first project to use the Cricut with but you definitely don’t need your own cutting machine to make this yourself.

DIY Cardboard Camera
Such a cute handmade toy for toddlers!
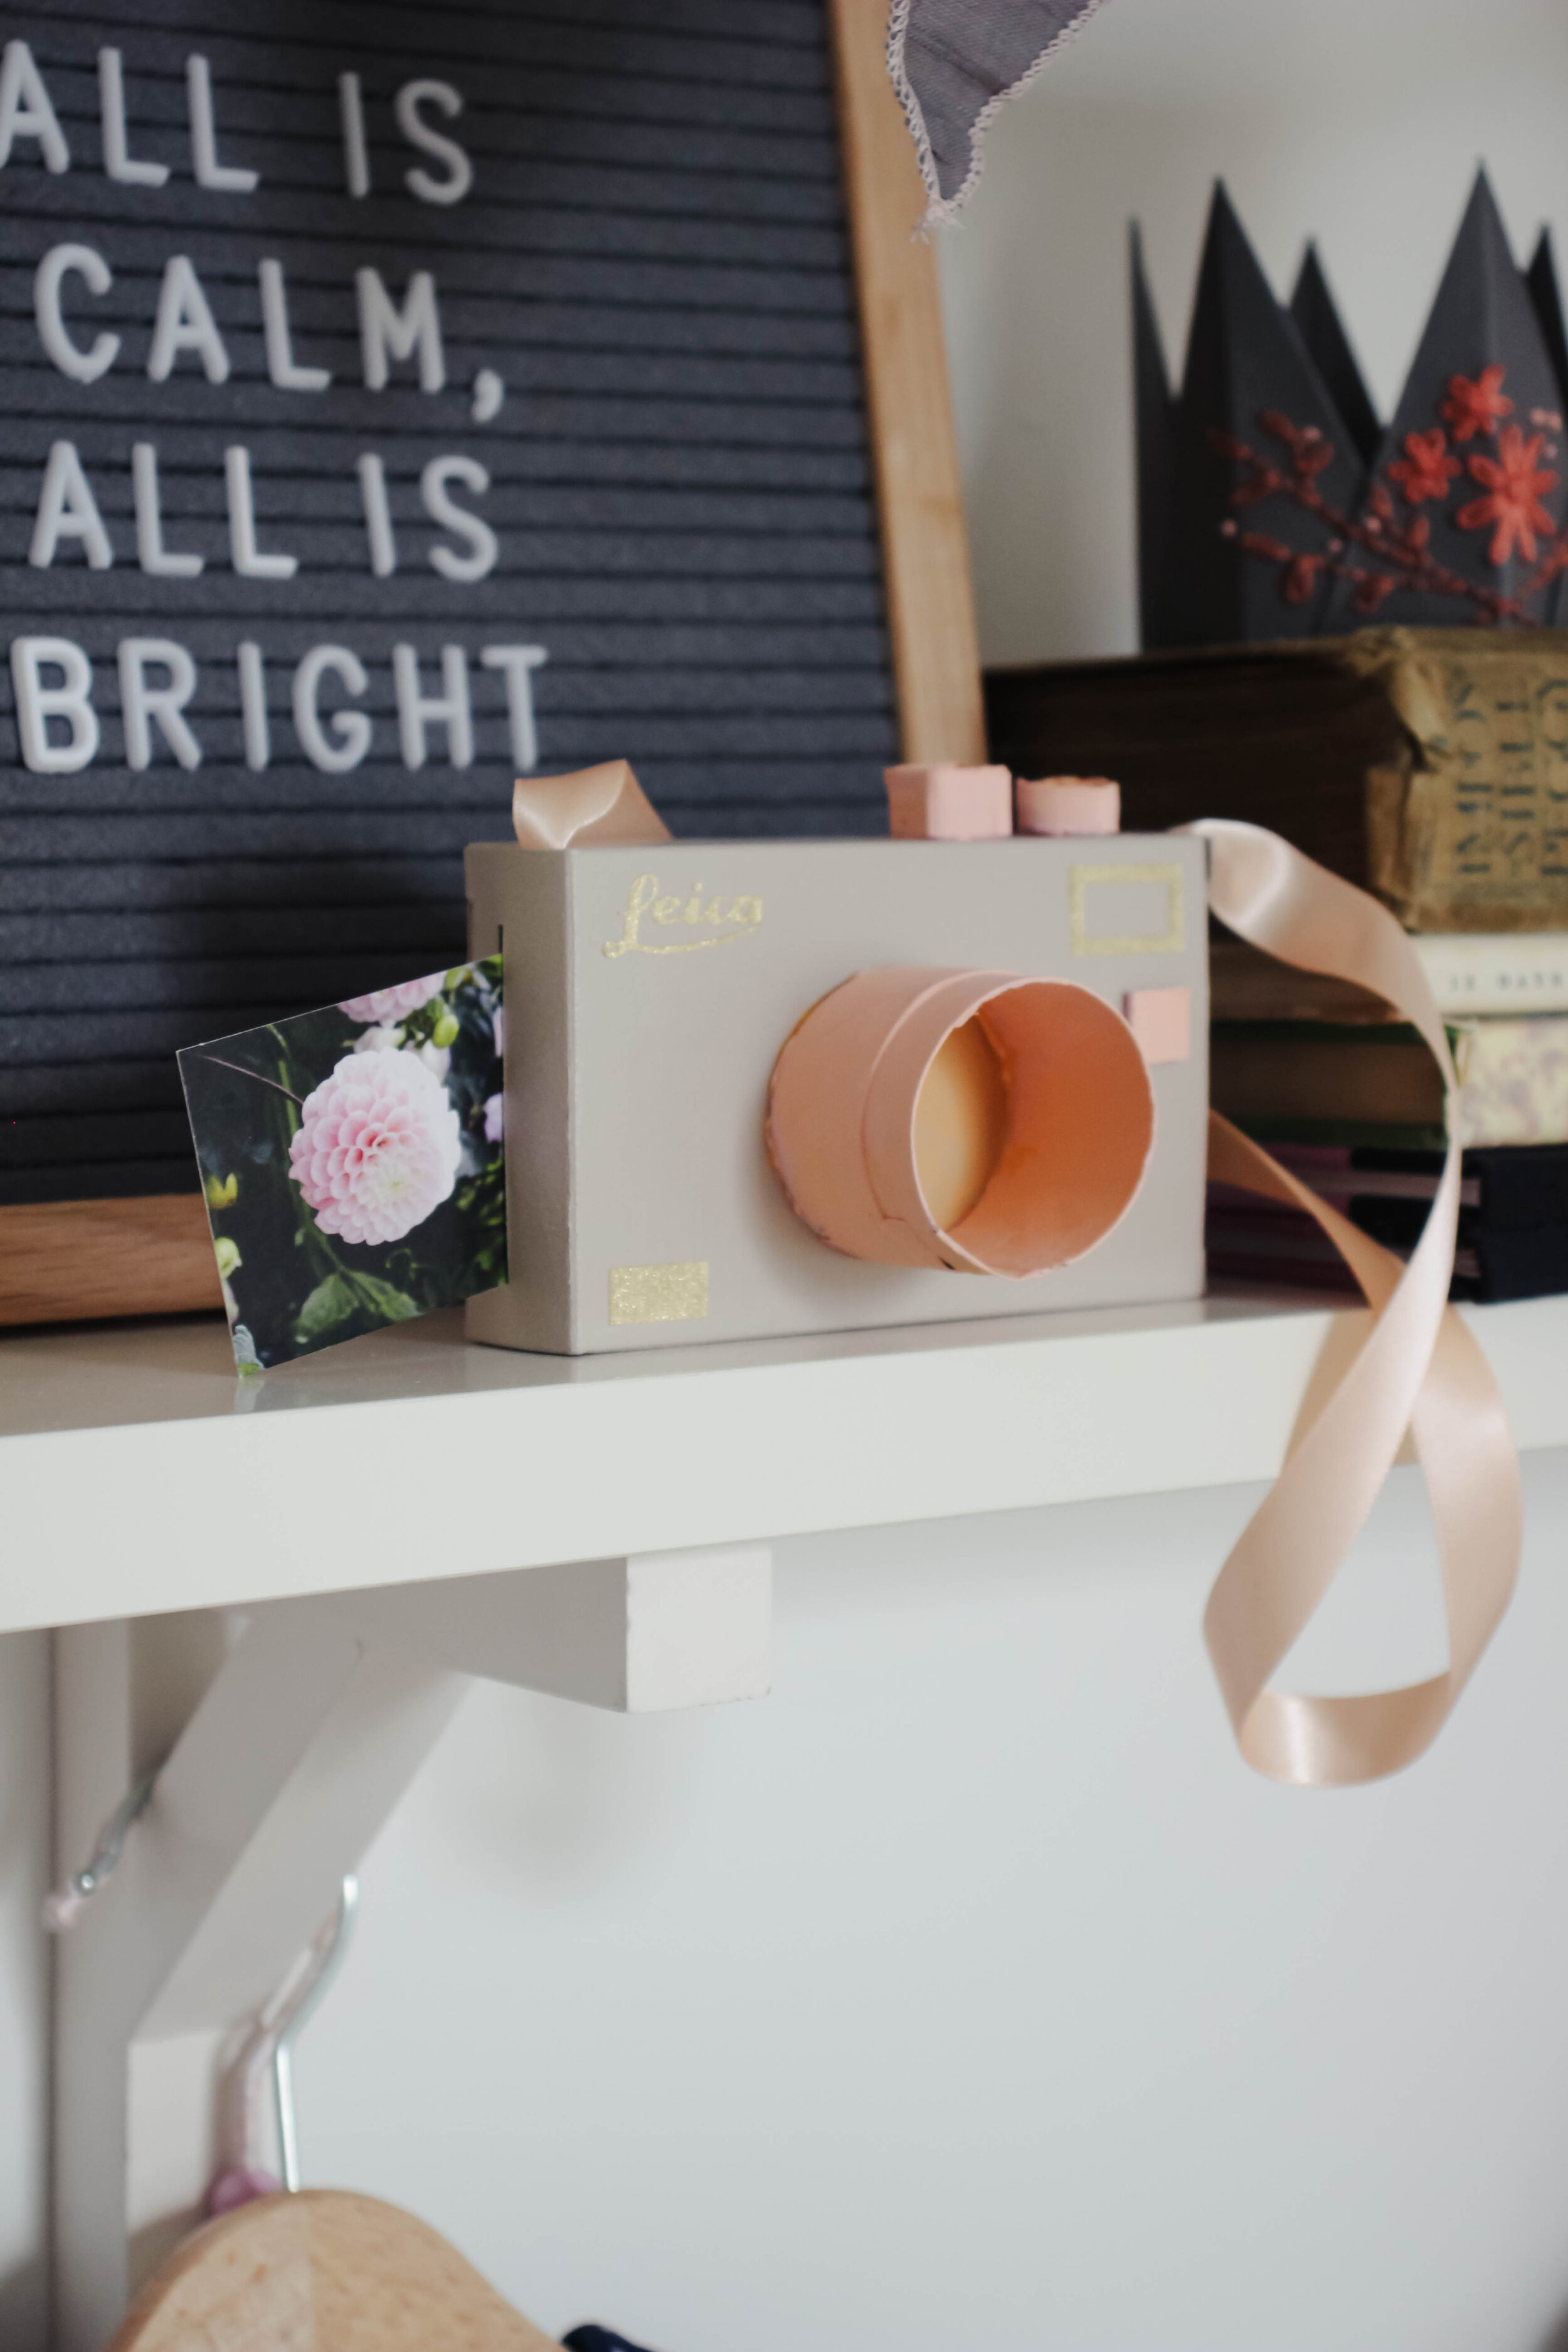
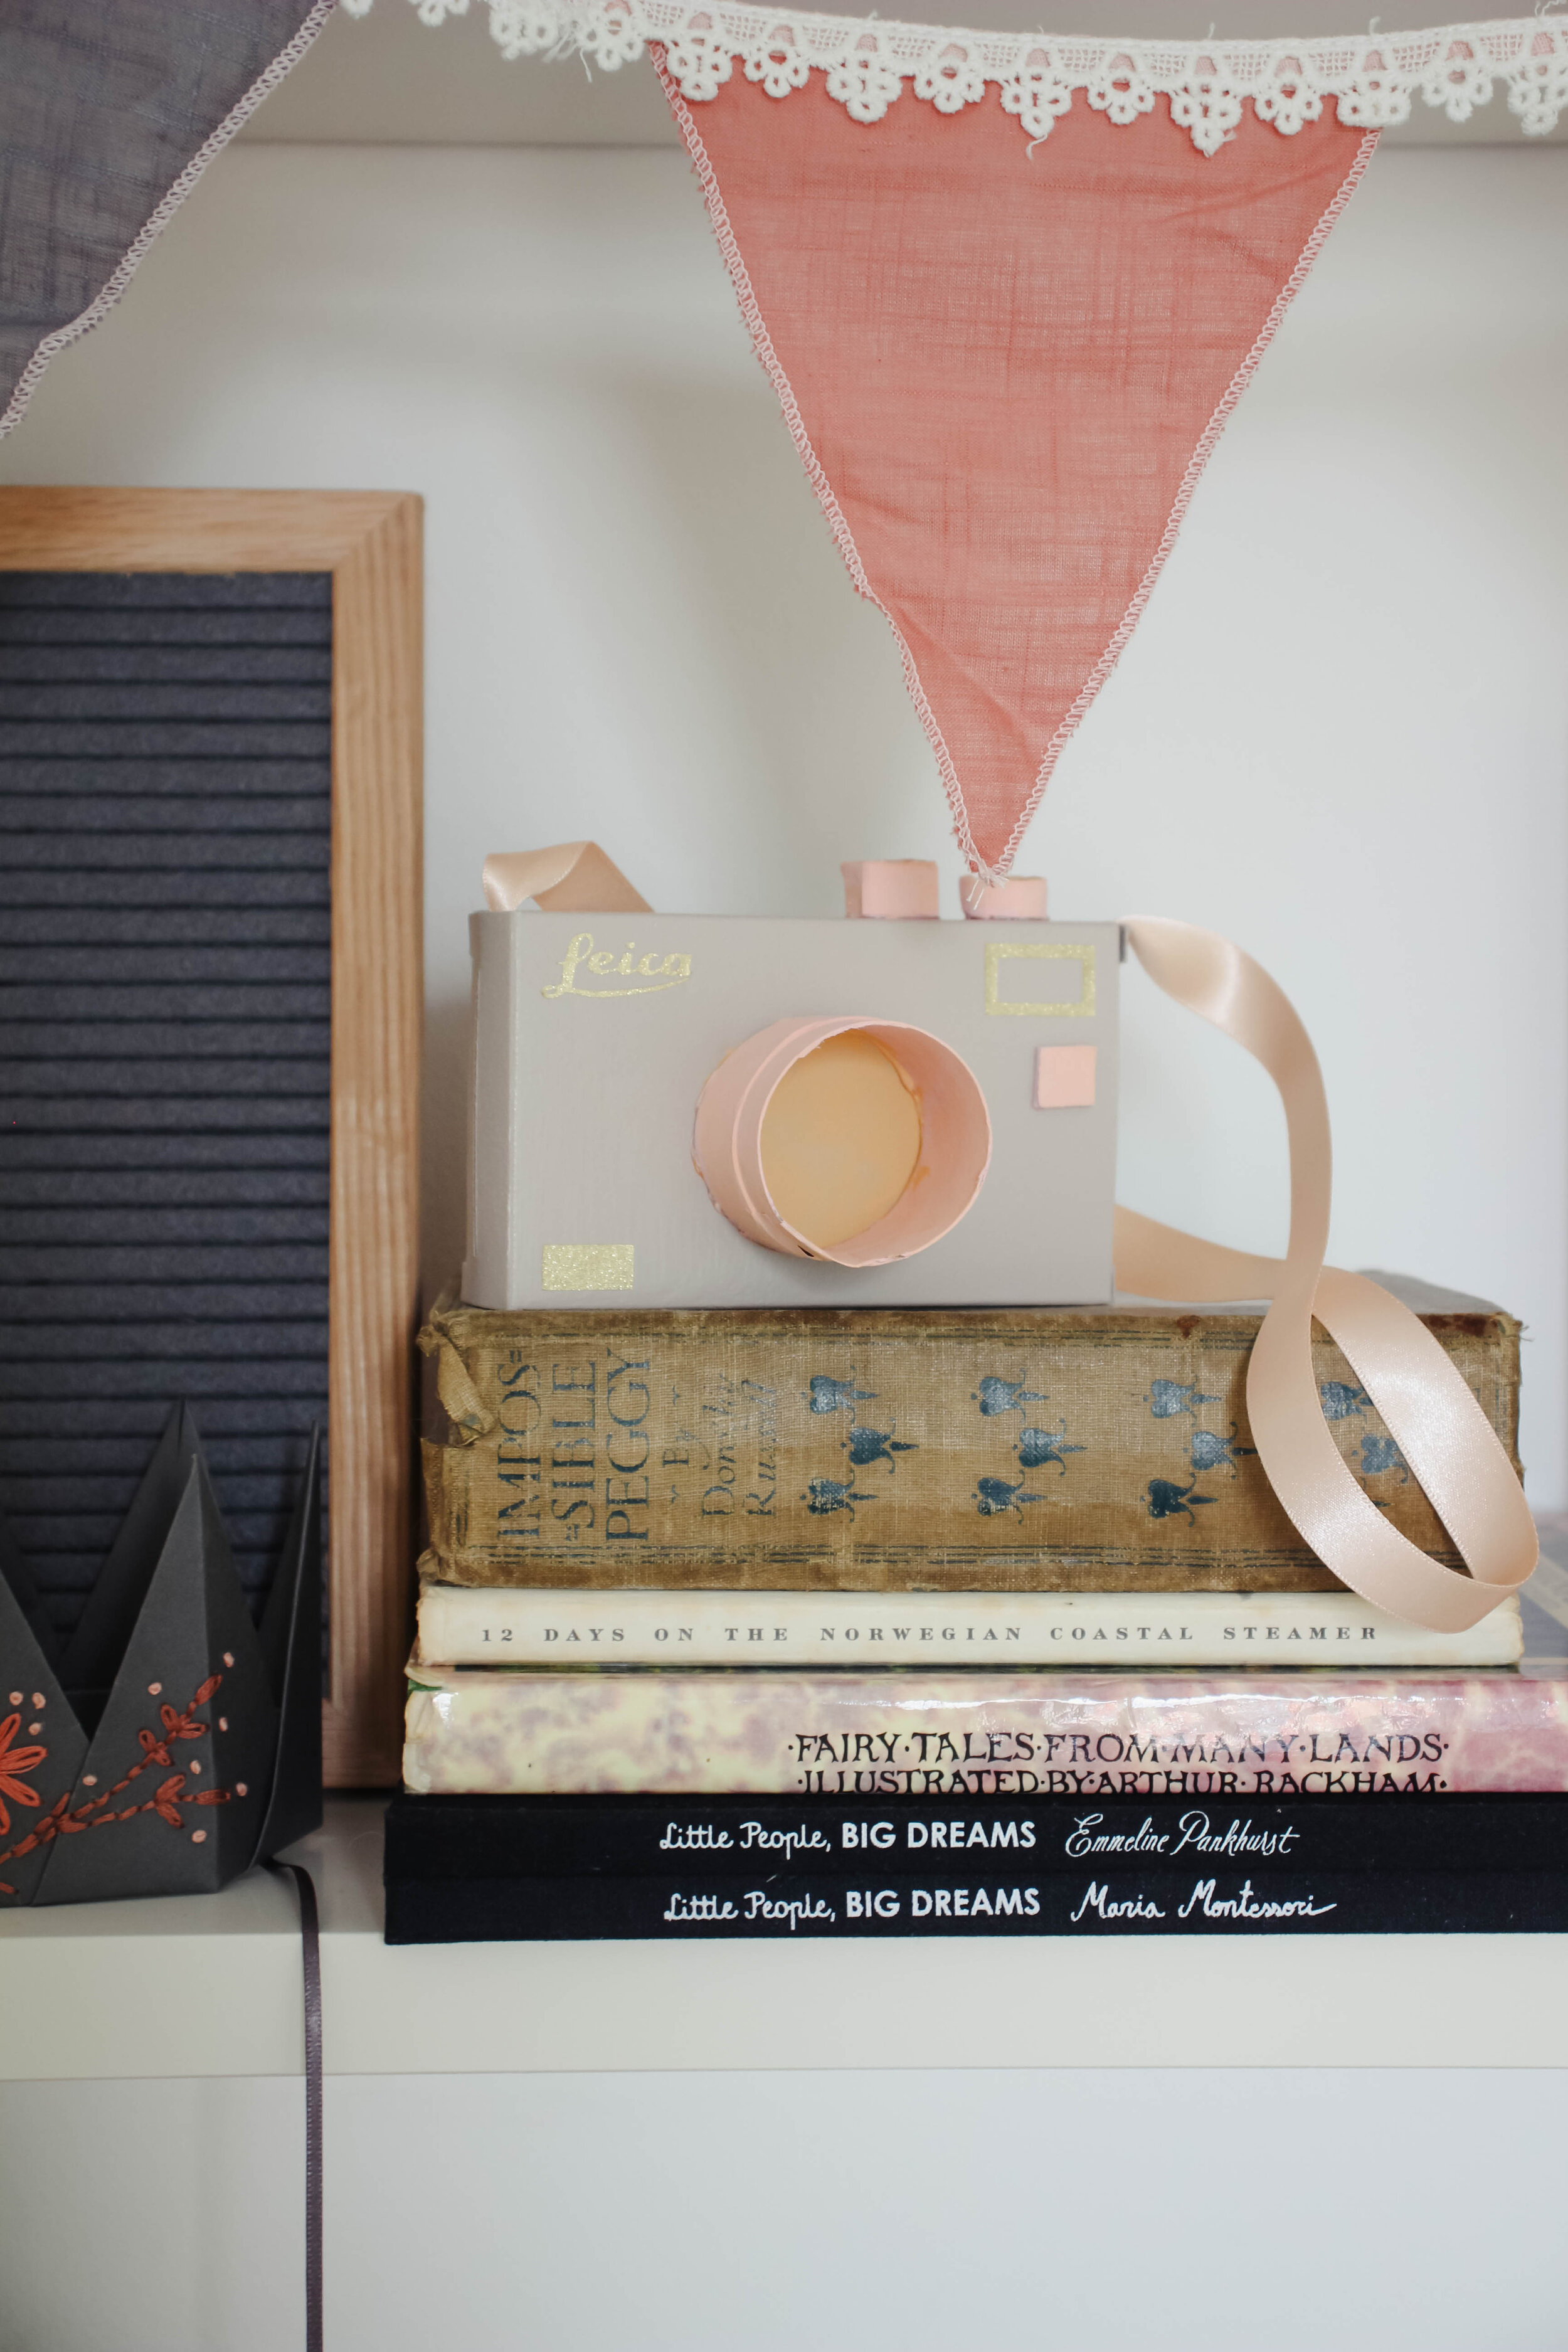
I love making things out of recycling for Peggy to play with, I find it really fun to work on a project and it’s also really a low-cost way to introduce new toys. This camera is very easy to make and you can customise it to suit your style. Make yours whatever size, colour, and shape you want but I went for something that I woudn’’t mind using! I also made little photos for Peggy to pull in and out of the camera body which makes this an interactive camera.
What you need
For the camera
A small cardboard box (or you can build one out of cardboard pieces)
Toilet roll
Washi tape, stickers or other decorative elements
Scissors
Tape
Strong glue
Spray paint or acrylic paint
Ribbon
For the photographs
Images cut out of magazines
Cardstock
Paper glue
Keep reading to find out how to make this adorable camera made out of recycling.
How to Make A Cardboard Camera
Paint the box that will make up the body of the camera in your choice of colour and set aside to dry.
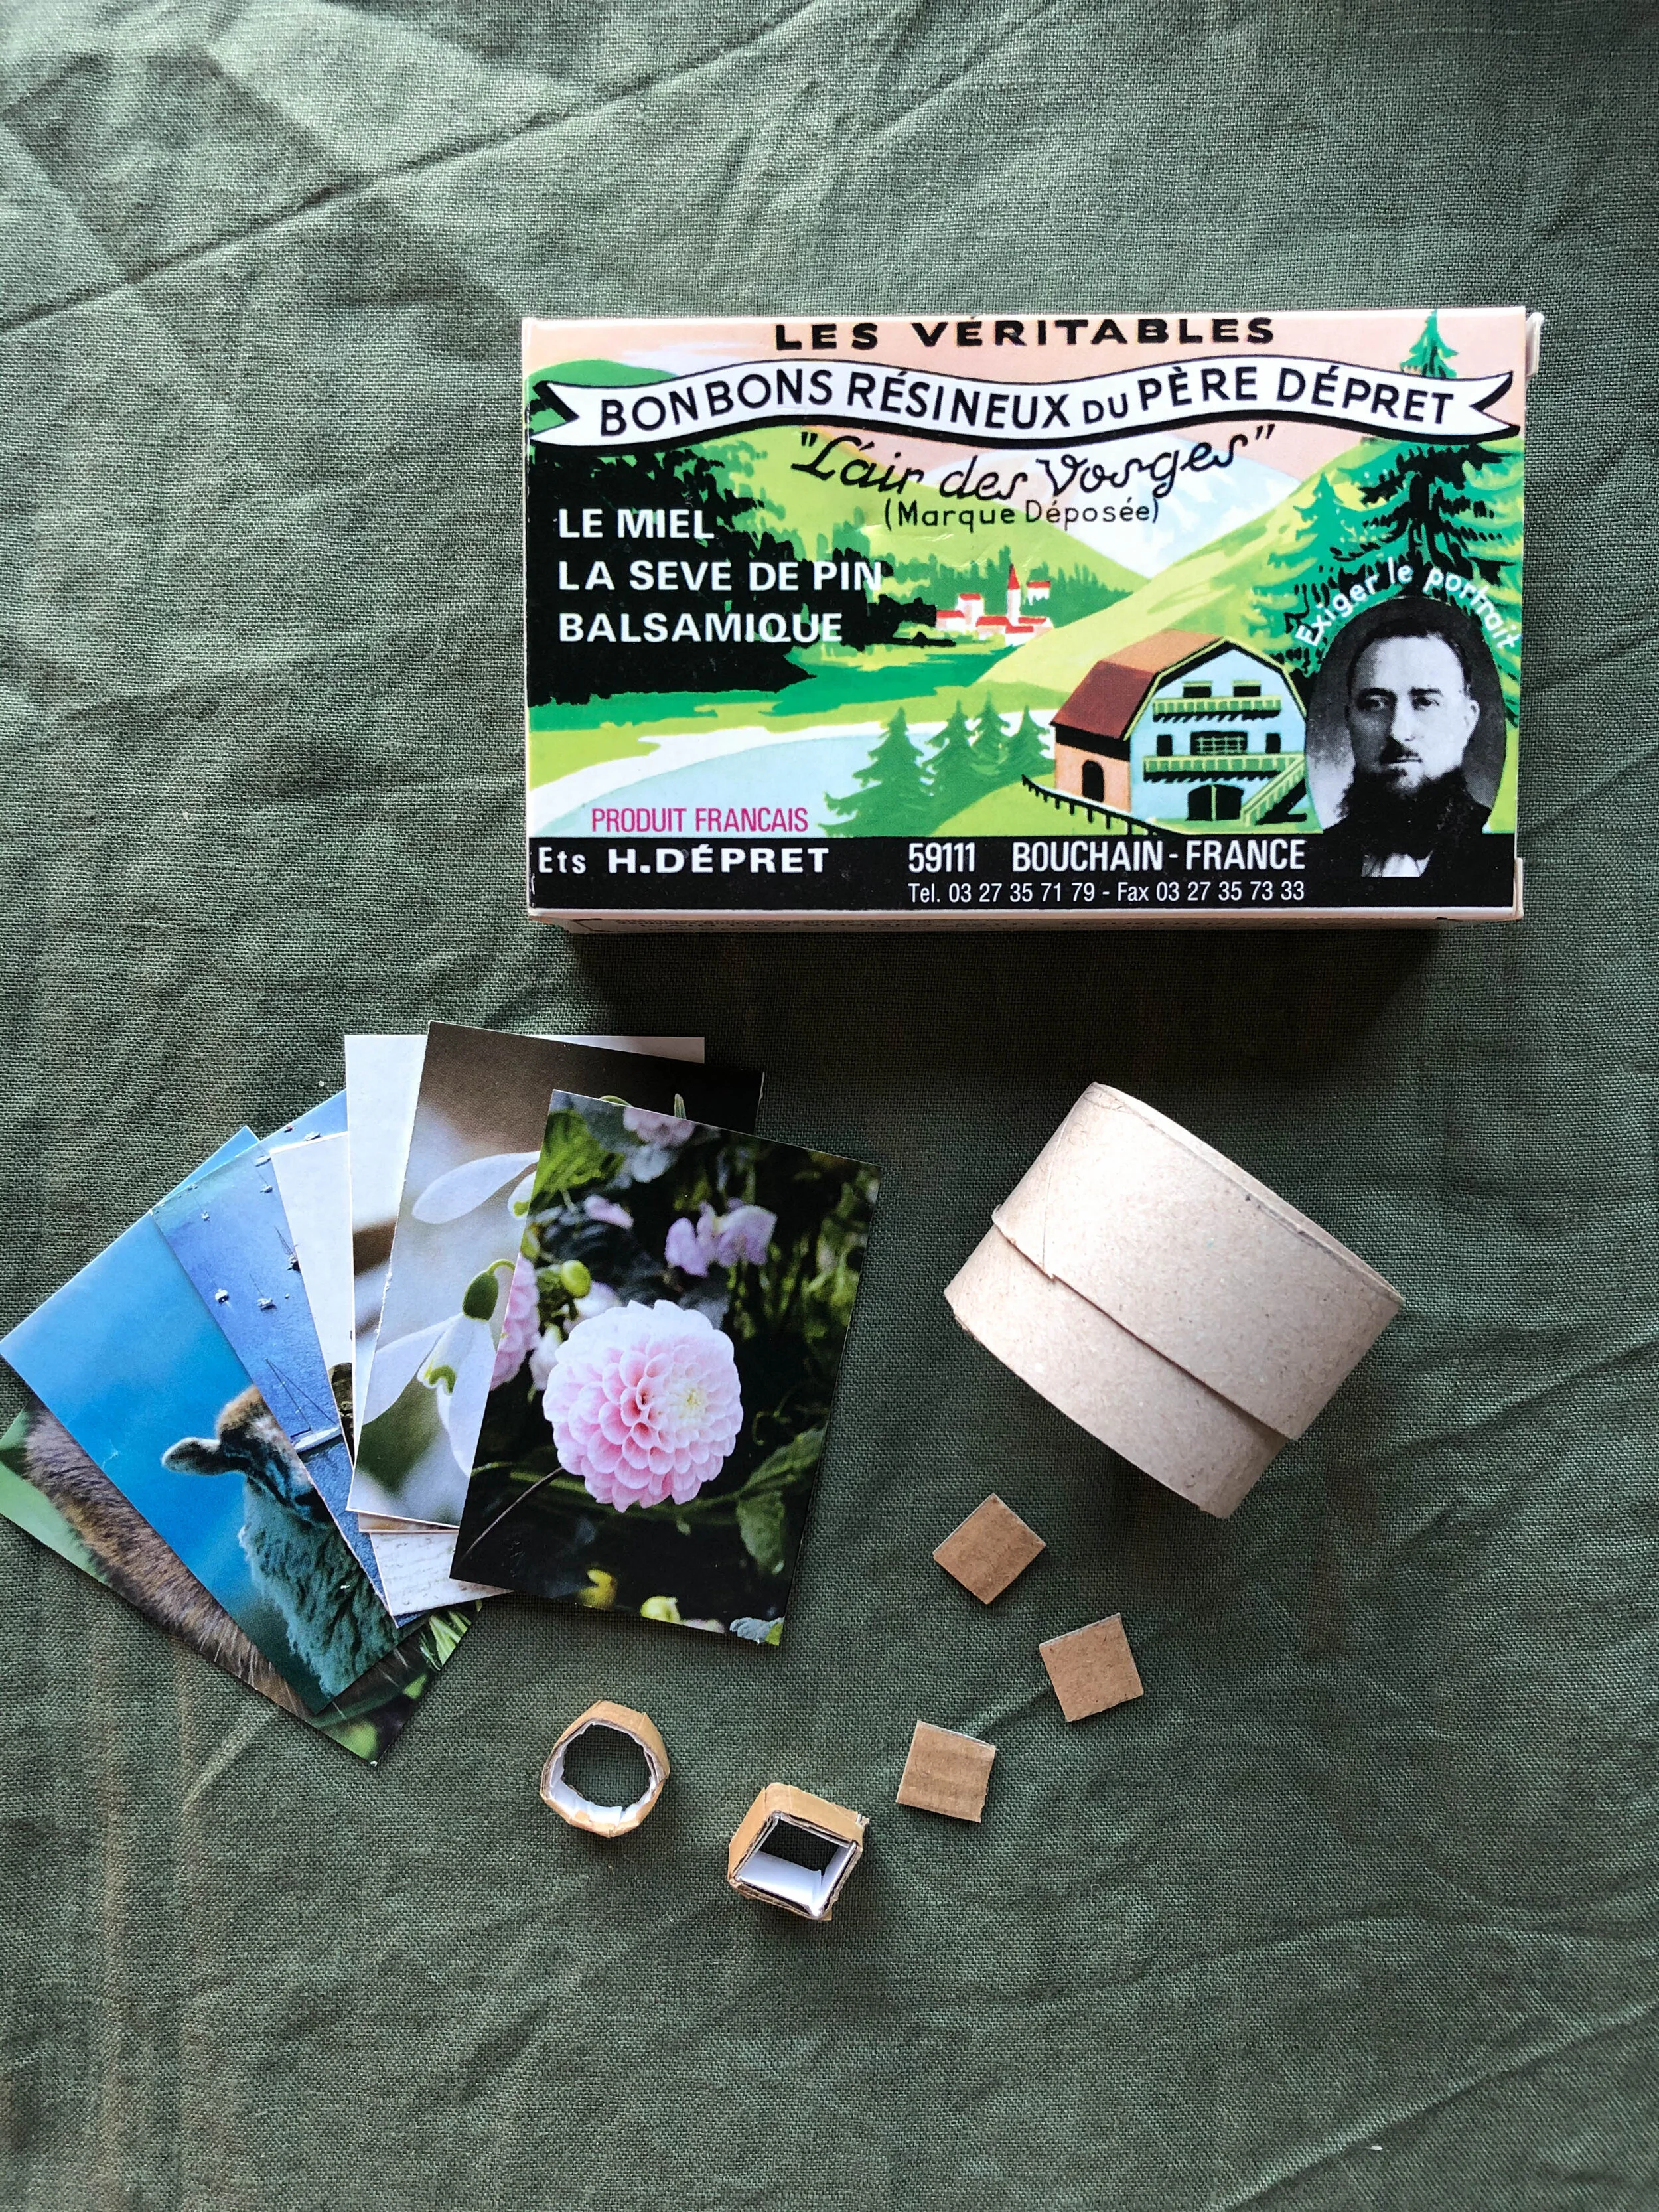
Make a lens by cutting a toilet roll in half. For a more realistic looking lens add a second ring of toilet roll over the first, this will make it look like a zoom lens. Paint the lens in a different colour to your camera.
Cut out any buttons that you want to add to your camera. I recommend looking at photographs of real cameras to use as a reference. Paint these buttons too.
This 4th step is an extra one but worthwhile!
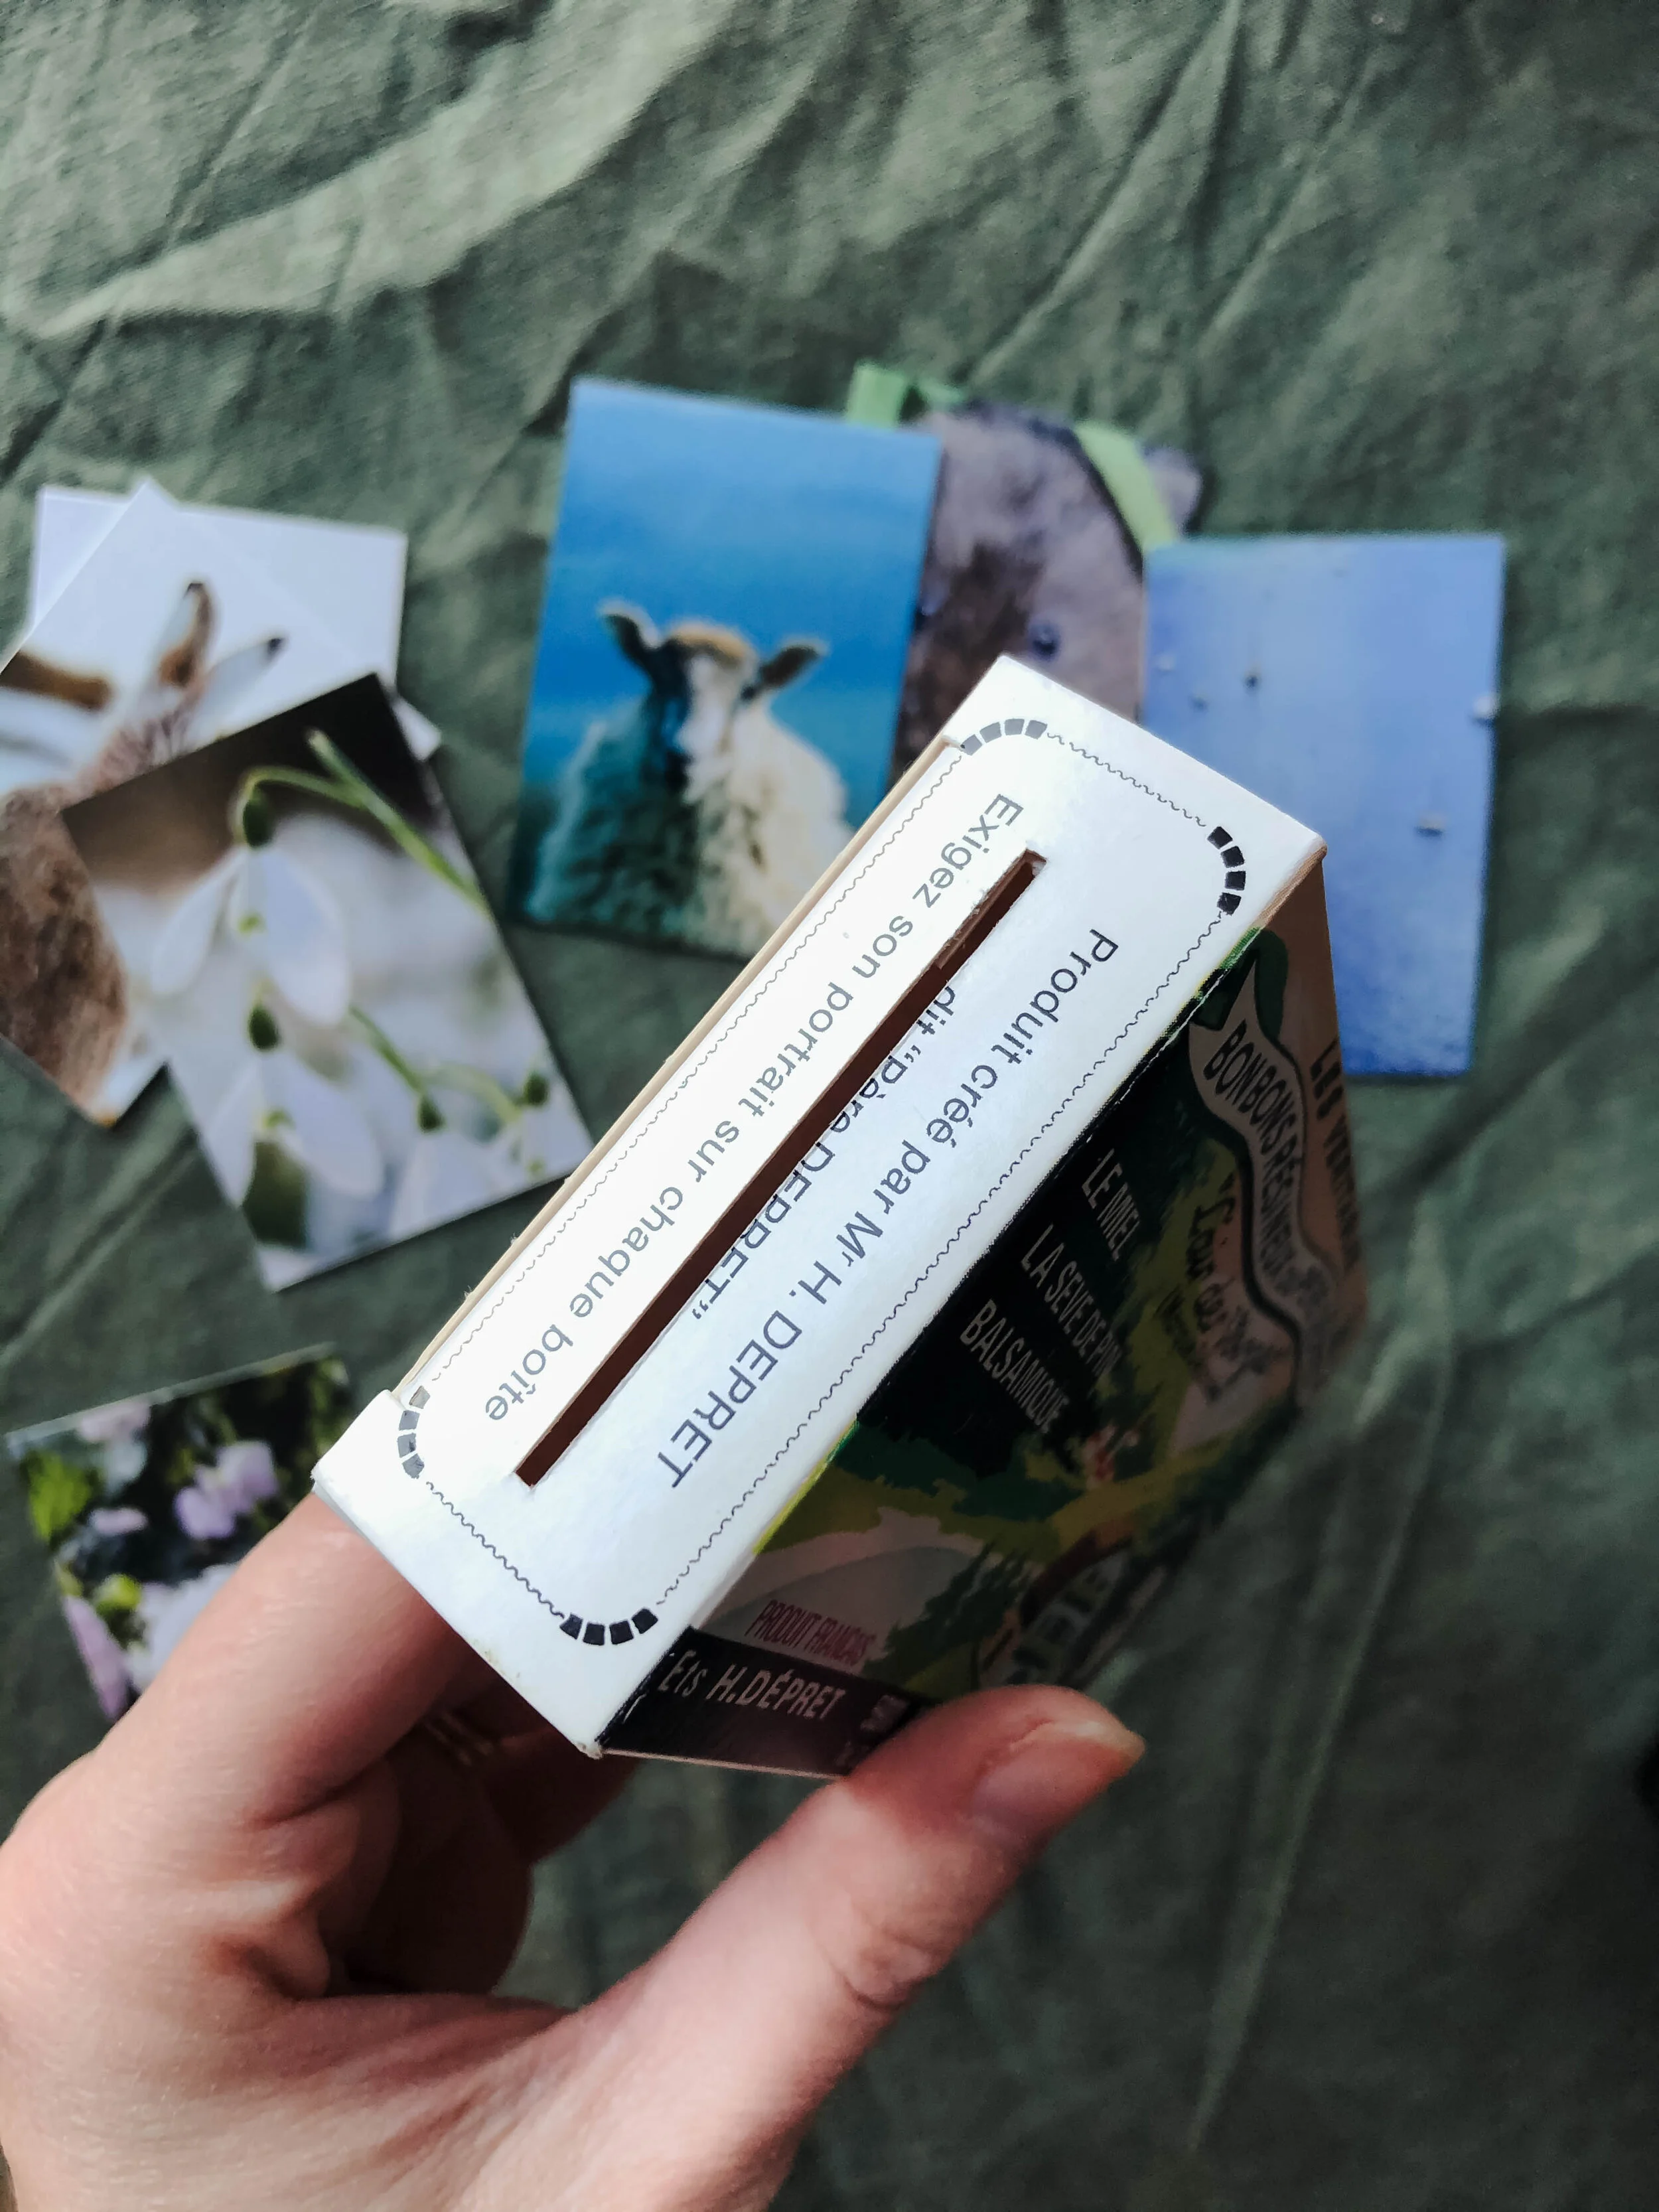
4. Cut a slit in one side of your camera body so your child can post and pull photographs into and out of the camera.
5. Make mini photos that will fit through this slit by cutting out images from magazines. Mount them onto cardstock so they are less flimsy. Alternatively, you can print images from a computer.
6. Glue on your lens and buttons to the camera body and add any other decorative embellishments, logos, or details you want to.
7. The final step is to glue a strap made out of ribbon so your child can wear their cute little camera!

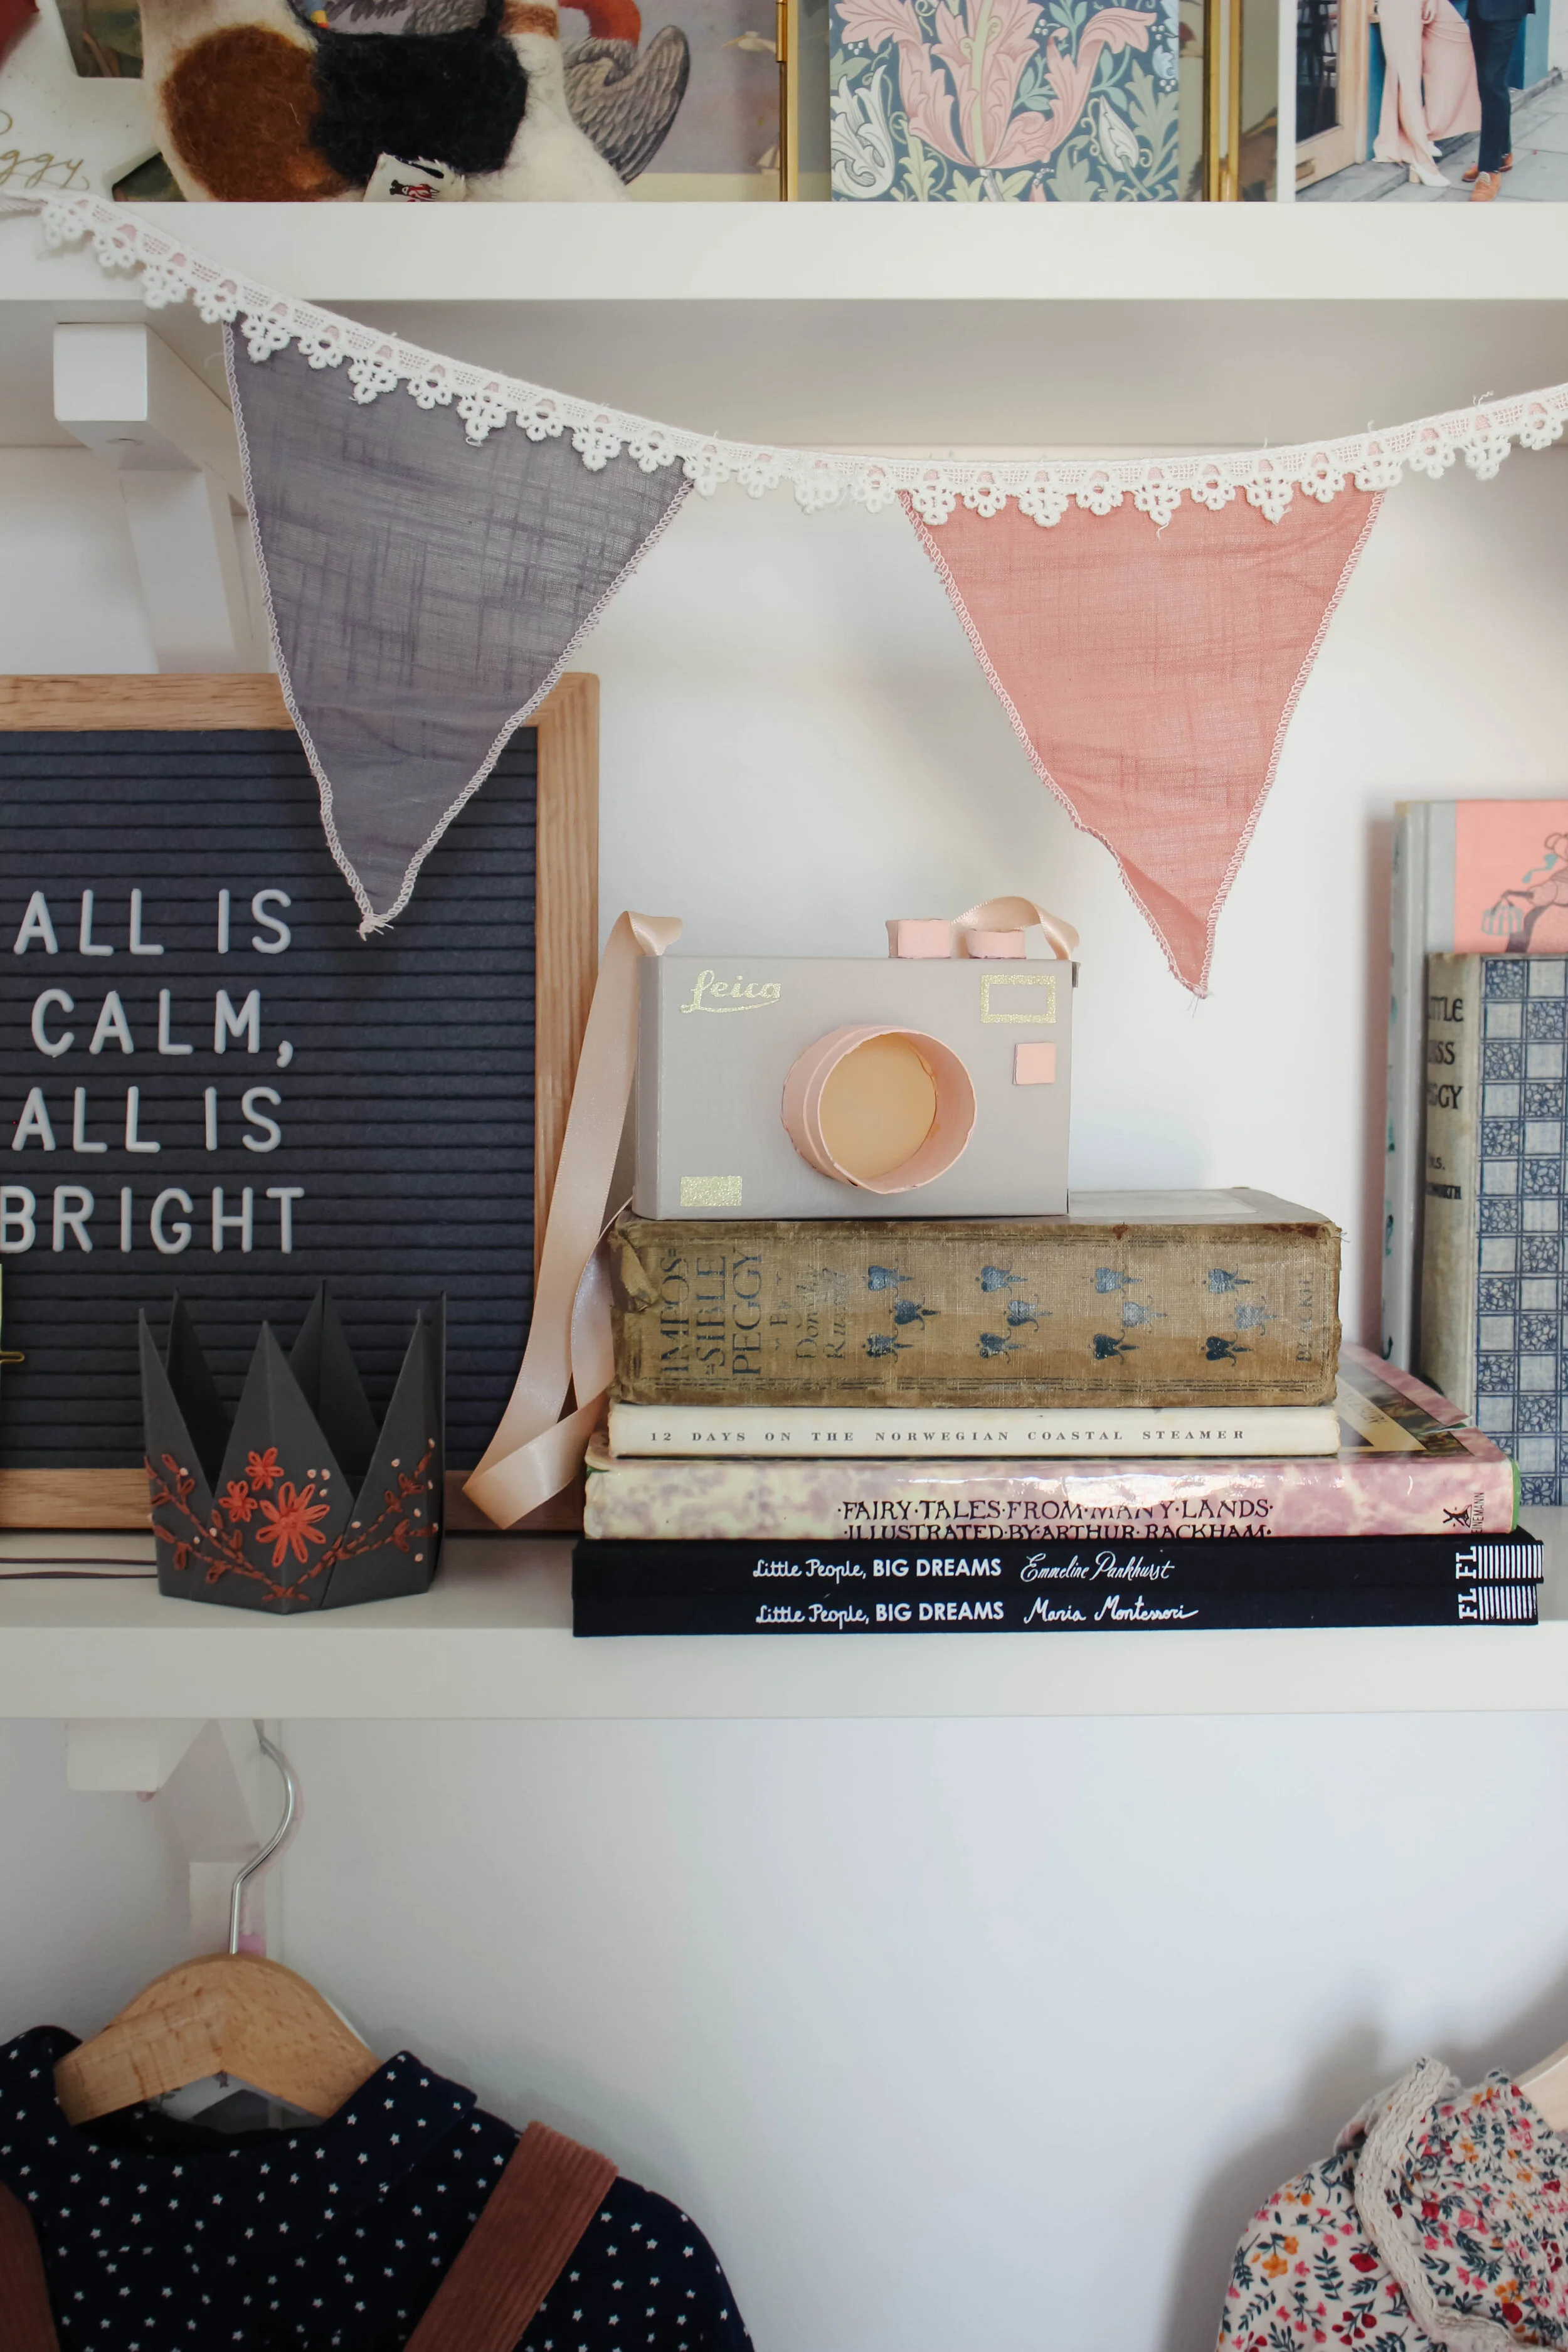
How adorable is Peggy’s wee camera? I’m so happy with it. I really hope she enjoys playing with it and explores the animals and flowers I chose for the little photographs. She loves my camera so I’m sure this will be a big hit.

If you like this idea and want more things to make for the young people in your life have a look at my Instagram as I have quite a few cardboard creations on there that I’m sure will inspire you. Have fun!

Hi I'm Nancy!
Thanks for stopping by, I hope you enjoyed the post. Make sure to drop by regularly for interior, style and travel inspiration as well as stories from my from daily life.