DIY Lime Wash Paint Effect
Ok, so it may have taken me a long time to get this post done but I hope it’s worth the wait. Blogging seems to have taken a back seat as it’s hard to find the time to sit and write with Peggy with me. I can’t believe she’s almost one!
Anyway, I’m very happy to have this DIY feature wall post ready for you to enjoy! This is a paint effect that will work with any colour. If you love that vintage, worn in look it’s a very easy way to add some personality to a room.
The Plan
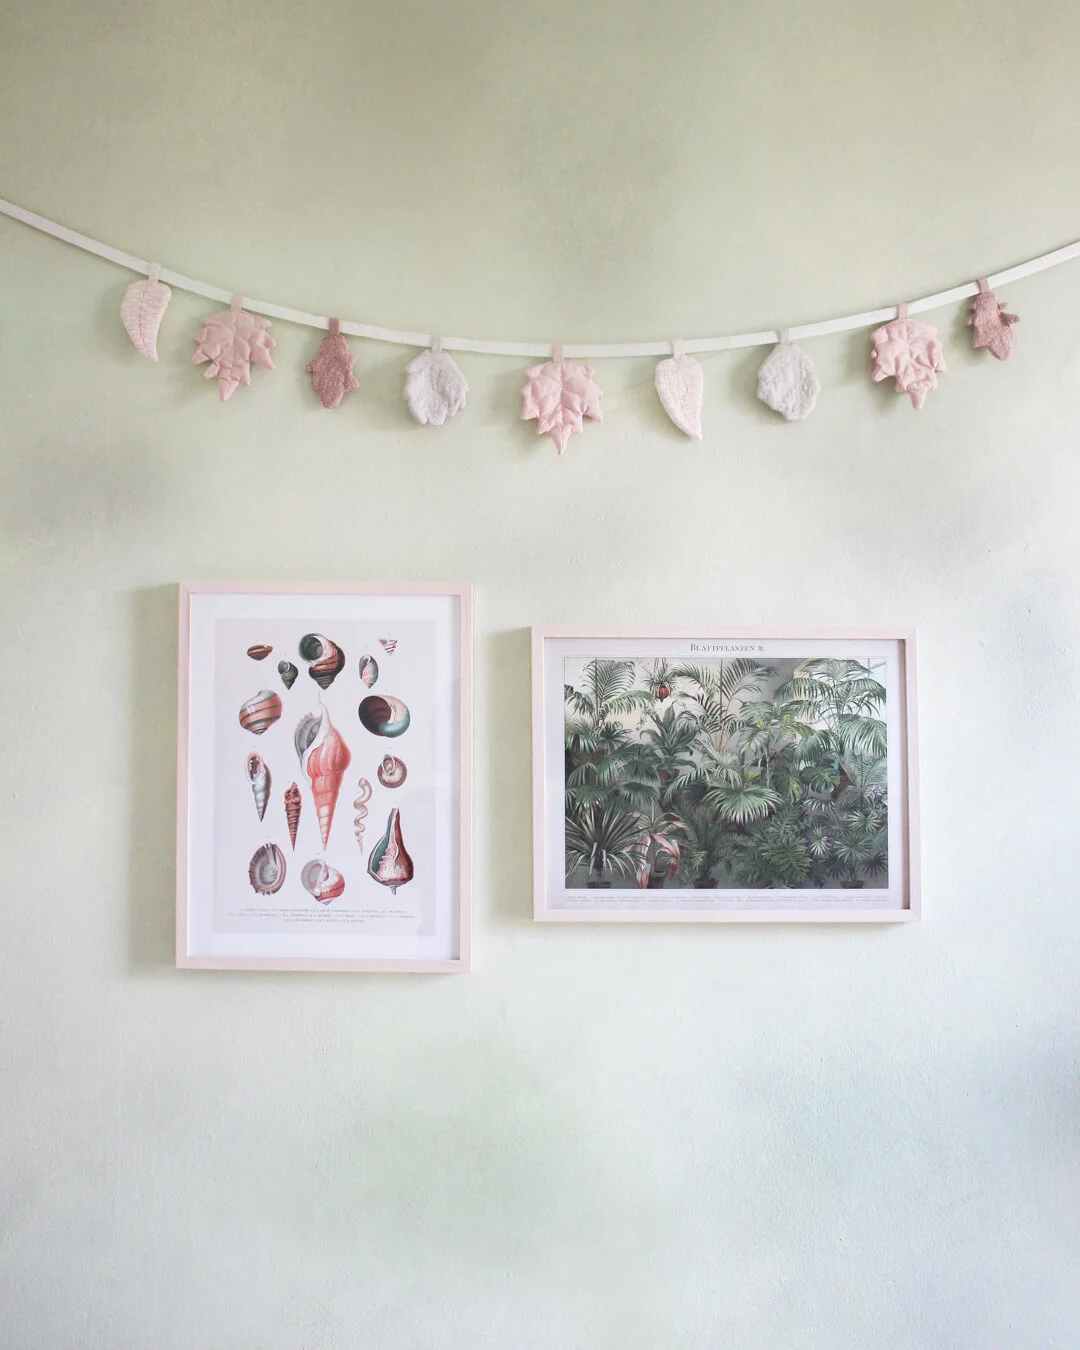
When we moved into this flat and I saw all the beautiful period features I knew that I finally had a chance to embrace my love of vintage style. Our old flat was a white box new build, very different! I wanted to create something interesting in Peggy’s room but I wanted it to be classic and timeless rather than trendy. After researching paint effects I came across lime wash effects (also known as colour wash and french wash) which have a very soft cloud like texture. Perfect!
I love bare pink plaster walls so I thought this effect would be a great option to replicate that look. I found this Youtube video which was so useful. The man in the video made it look so easy!
What I did
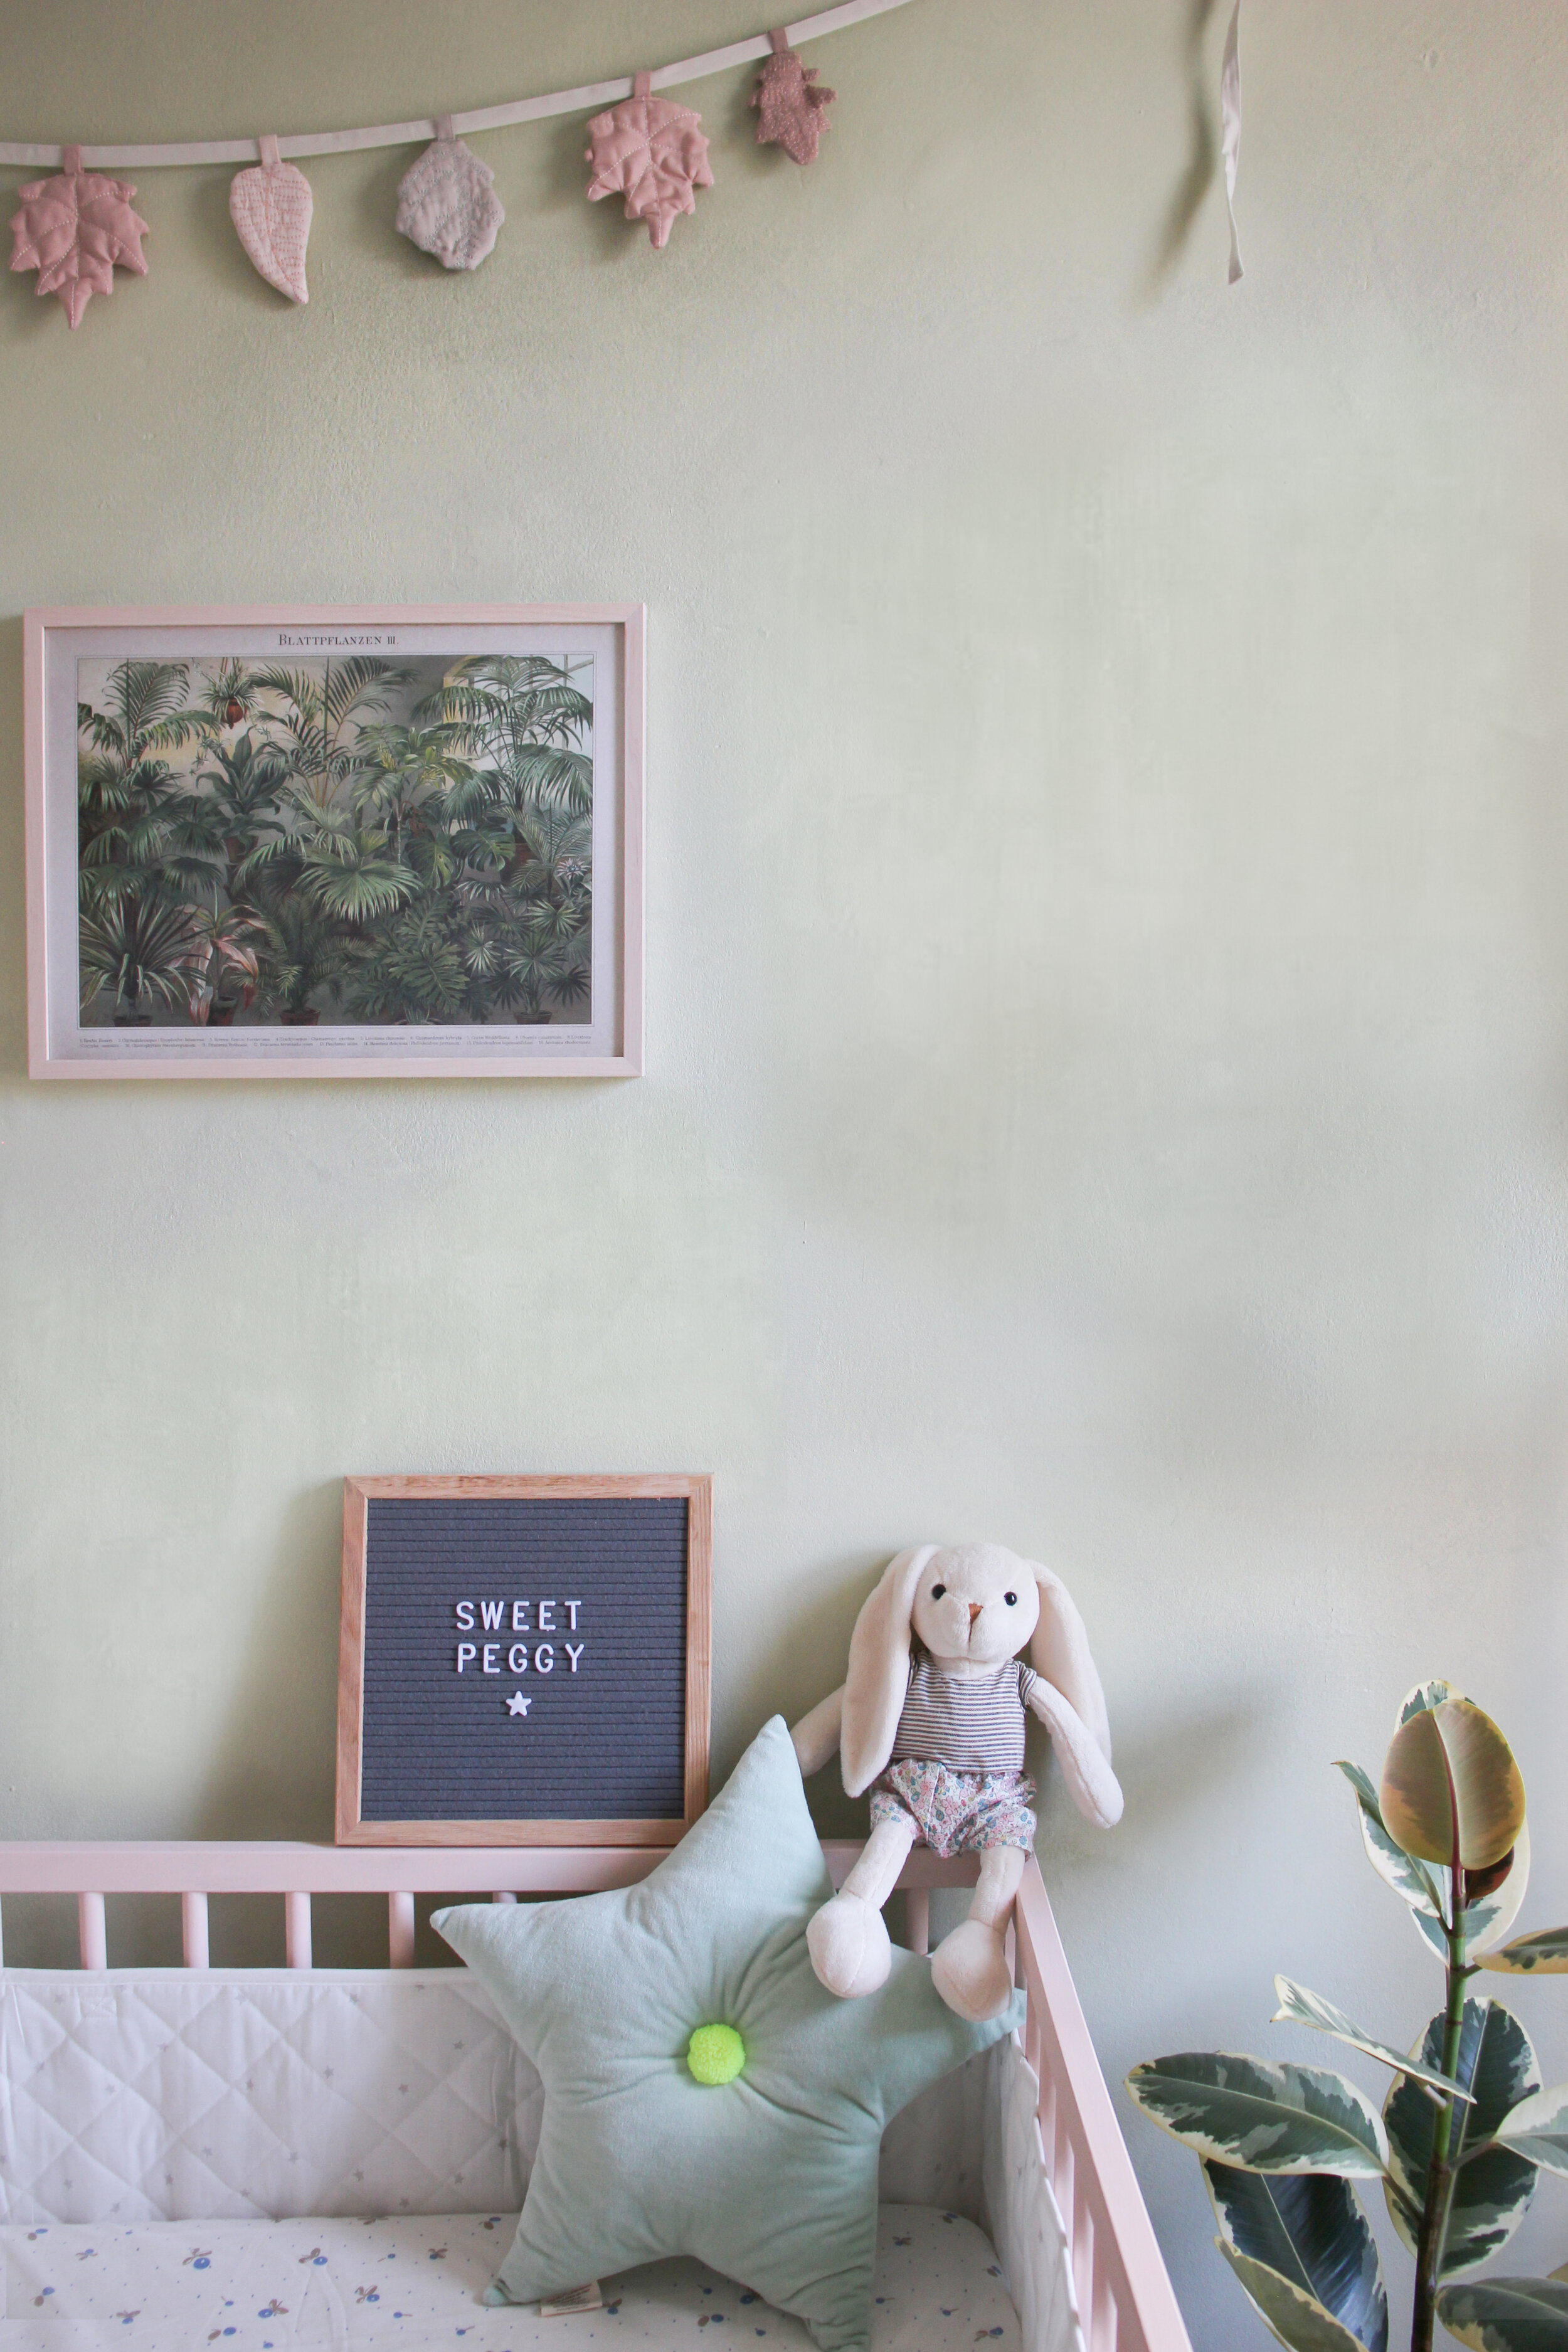
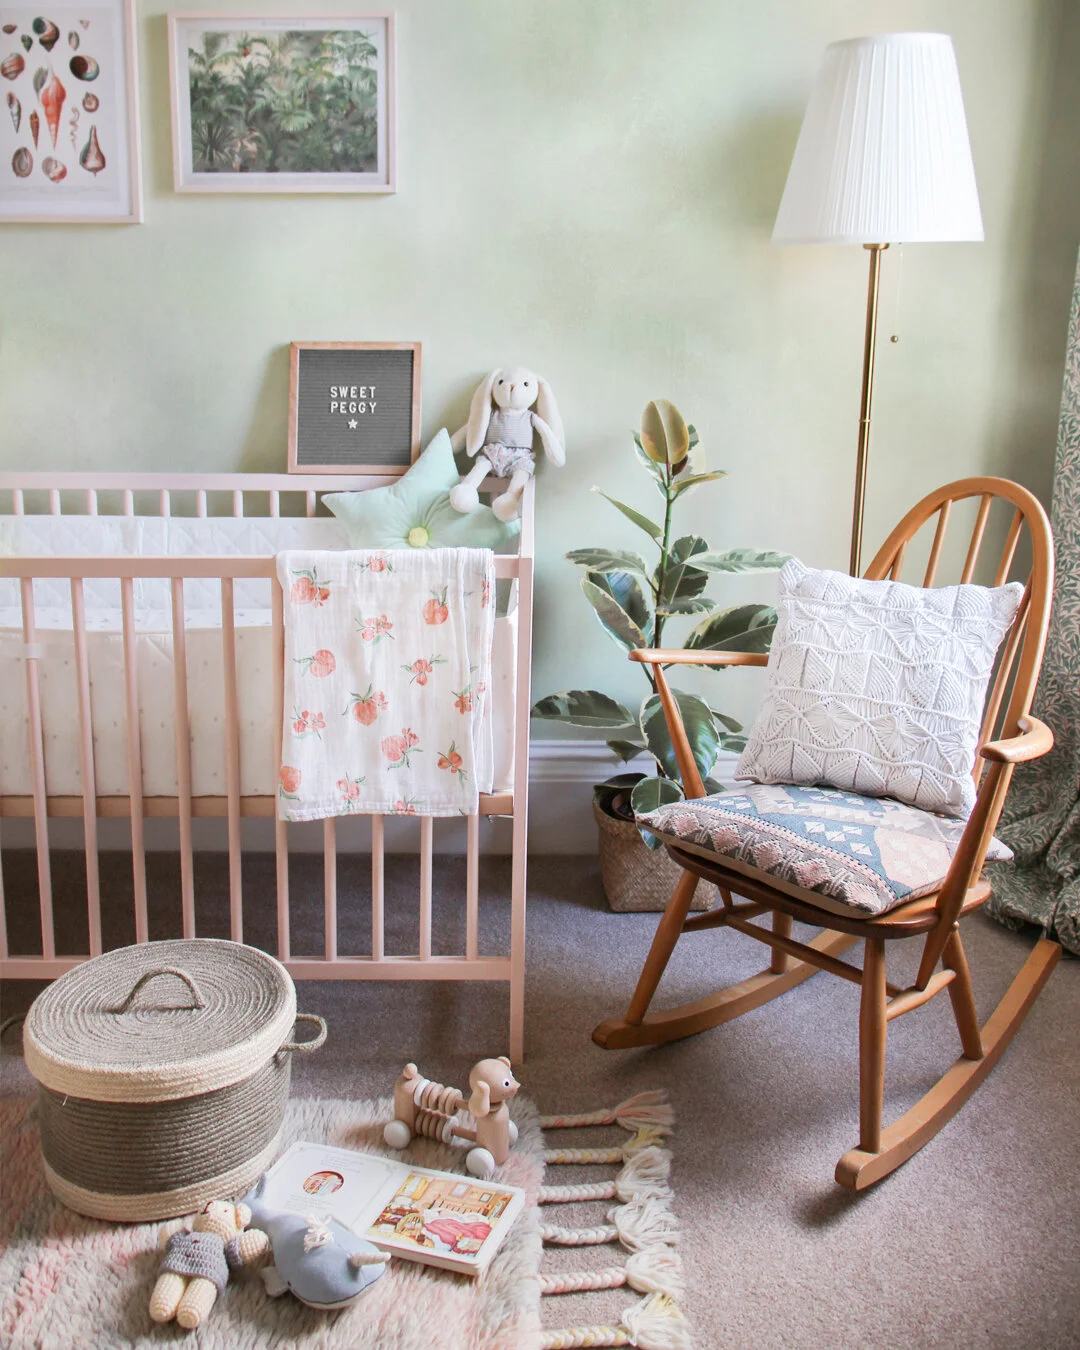
I had decided, whilst I was pregnant, that I wanted to create a really calm nursery for Peggy. I wanted to use sage green tones for a nature inspired and neutral room, very peaceful and classic. I went to B&Q and chose a few colours by Valspar.
The colours I used were a base of Wild Hillside, then I watered down Asian Silk to use as the colour wash over the top. Simon and I painted the wall in Wild Hillside, giving it a few coats. Once it was dry I added water to Asian Silk until it had the consistency of single cream.
I used a large brush and applied the paint in a loose criss cross motion to the whole wall in sections, blending as I went. As you apply the paint you should flick your wrist and keep your movements loose. You just have to go for it and trust in the process! The wash needs to be applied really quickly and in one go otherwise you'll get streaks.
As soon as it started to dry, I saw the paint application become softer and more cloud-like. Finally, I painted her wooden cot in a pale pink colour called Bare Necessity which complimented the green perfectly.


I hope that post was useful. If you’re interested in giving this paint technique a try I highly suggest that you watch that YouTube video (and maybe a few more!). Enjoy!
Hi I'm Nancy!
Thanks for stopping by, I hope you enjoyed the post. Make sure to drop by regularly for interior, style and travel inspiration as well as stories from my from daily life.